International travel brings excitement and adventure, but it also comes with the downside of additional responsibilities that you may be tempted to skip. One inevitable aspect of travel is ensuring the security of your smartphone. While iPhones are generally secure devices with built-in features like encryption and biometric authentication, the reality is that no device is immune to potential threats.
Travel exposes your iPhone to both physical actors (malicious individuals) and different networks (heightened risks of cyber threats).
To secure your iPhone for international travel, implement pre-travel measures such as utilizing a VPN, performing data backups, and activating the Find My iPhone feature. Adopt daily practices: set strong passcodes, enable Multi-Factor Authentication, and keep iOS and apps updated.
In this guide, we’ll explore such pre-travel practices and common iPhone security measures that you should incorporate to fortify your device against potential threats.
Pre-Travel Security Practices
Your iPhone, filled with sensitive information and valuable data, requires special attention to safeguard against potential threats and unauthorized access. Preparation starts before you land in a foreign city. Follow these steps to ensure a worry-free and enjoyable journey.
Set up a Virtual Private Network (VPN)
Before embarking on your international adventure, consider setting up a Virtual Private Network (VPN) on your iPhone. A VPN encrypts your internet connection, providing an additional layer of security, especially when using public Wi-Fi networks.
Many travelers who get a VPN may have it installed on their laptop, but somehow neglect setting it up on their phones.
Regardless of the VPN service, these are the general steps you’d follow to set up a VPN on your iPhone:
- Download the VPN App:
- Go to the App Store on your iPhone.
- Search for the VPN service of your choice.
- Download and install the VPN app.
- Sign Up or Log In
- Sign up for an account if you don’t have one. VPN services generally require you to create an account to use their services.
- Log in to the VPN app.
- Enable the VPN:
- Toggle the switch or press the “Connect” button to enable the VPN connection.
- A VPN icon will appear in the status bar at the top of your iPhone screen, indicating that the VPN is active.

Do not neglect these steps because most of you would access your financial and banking apps while overseas via your smartphone. It’s common for travelers to check balances, do currency exchange, transfer money between accounts, and manage their finances on the go. VPN encryption ensures that sensitive information, such as your login credentials and financial transactions, is secure and less susceptible to interception by malicious actors.
Related: VPN: When to Toggle On and Off While Traveling
Back up Your Data
One of the first steps before any trip is to back up your iPhone’s data. Use iCloud or iTunes for a comprehensive backup to ensure you have a copy of your important data, including photos, contacts, and app data. In case of loss, theft, or any unforeseen issues during your travels, having a recent backup ensures you can quickly restore your device and access essential information.
Here are the steps for backing up to iCloud:
- Enable iCloud Backup:
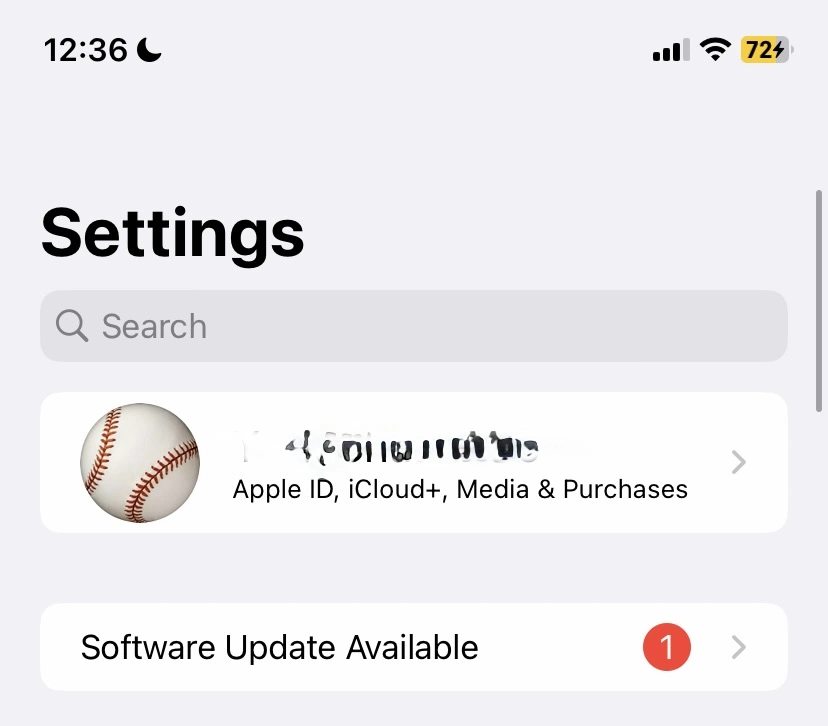
- Go to Settings on your iPhone.
- Tap on your [Apple ID] at the top of the screen.
- Select iCloud.
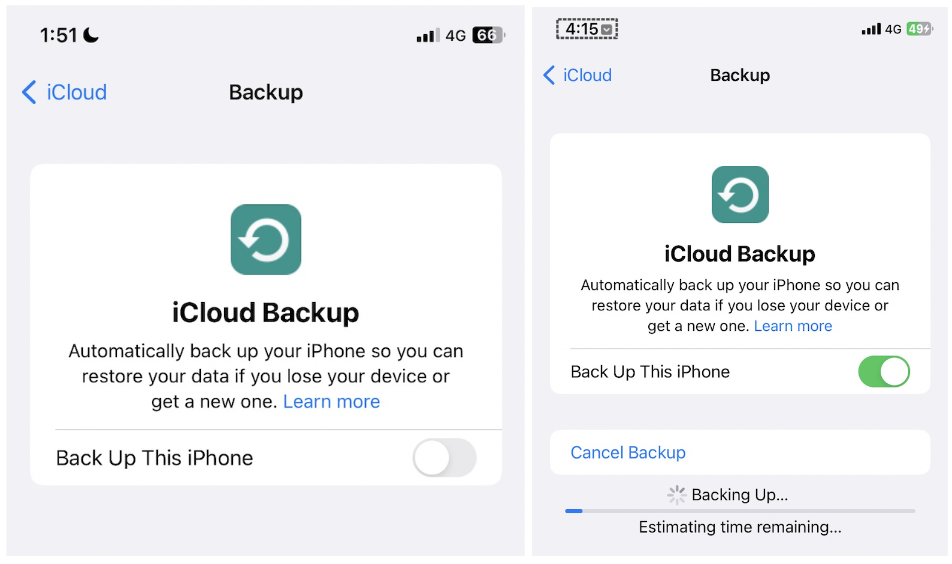
- Scroll down and tap iCloud Backup.
- Toggle the switch to turn on iCloud Backup.
- Initiate Backup:
- Once iCloud Backup is enabled, tap on Back Up Now to start the backup process. Ensure that your phone stays connected to Wi-Fi during this entire process (instead of mobile data which may be expensive).
- Verify Backup:
- After the backup is complete, you can check the status and time of the last backup in Settings > [your name] > iCloud > Manage Storage > Backups.
It literally takes a few minutes once you understand how this process works. The frustrating part for some people is the potential need to buy extra iCloud storage if you’re out of space, or incurring some extra time required to delete existing items from iCloud storage to free up space. Nonetheless, it’s worth backing up your iPhone.
Turn on Find My iPhone
Use “Find My iPhone” to prepare and secure your iPhone during travel. This feature allows you to locate your device, remotely lock it, play a sound, or erase its contents in case it gets lost or stolen.
Here are the steps to use “Find My iPhone” on your device:
- Enable Find My iPhone:
- Go to your iPhone’s Settings.
- Tap on your Apple ID at the top of the screen.
- Select “Find My.”
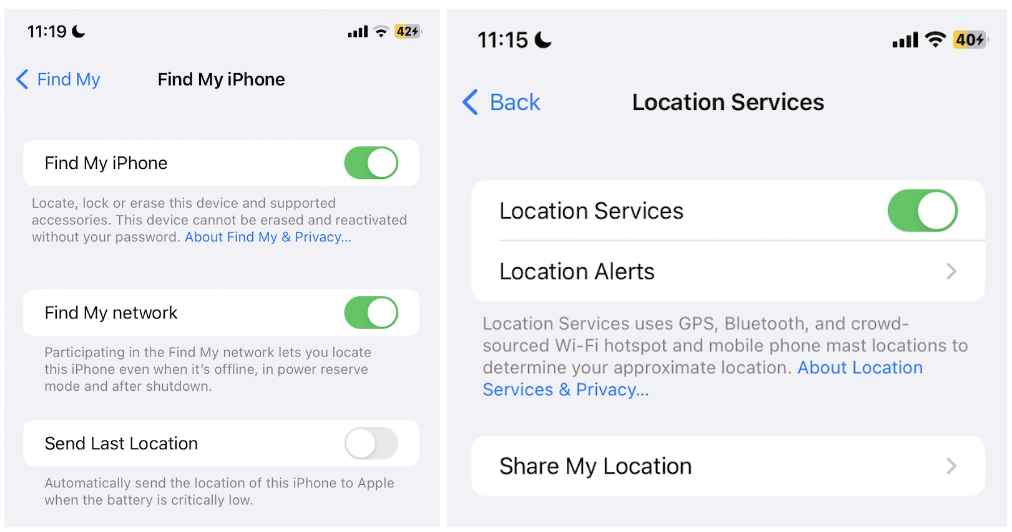
- Toggle the switch next to “Find My iPhone” to enable it.
- To locate your iPhone even when it’s offline, turn on “Find My network“.
- Ensure that location services are turned on (so that your phone can communicate its current location to the iCloud service).
- Go to Settings > Privacy & Security > Location Services
- Turn on Location Services.
In case your iPhone gets lost or stolen, having “Find My iPhone” enabled can be a lifesaver. These steps will help to accurately pinpointing the location of your iPhone on a map.
This article was originally published on unboundist.com. If it is now published on any other site, it was done without permission from the copyright owner.
Daily iPhone Security Practices
While preparing your iPhone for international travel is crucial, many practices used to safeguard your iPhone abroad are also essential for your everyday digital life. Whether you’re at home or exploring new destinations, these habits will secure your iPhone against potential threats.
Exercise caution when using public WiFi: Generally you should exercise caution and only join trusted networks that you know are secure. Ideally these networks should be password protected. Otherwise, you can connect to public WiFi worry-free by using a reliable VPN service.
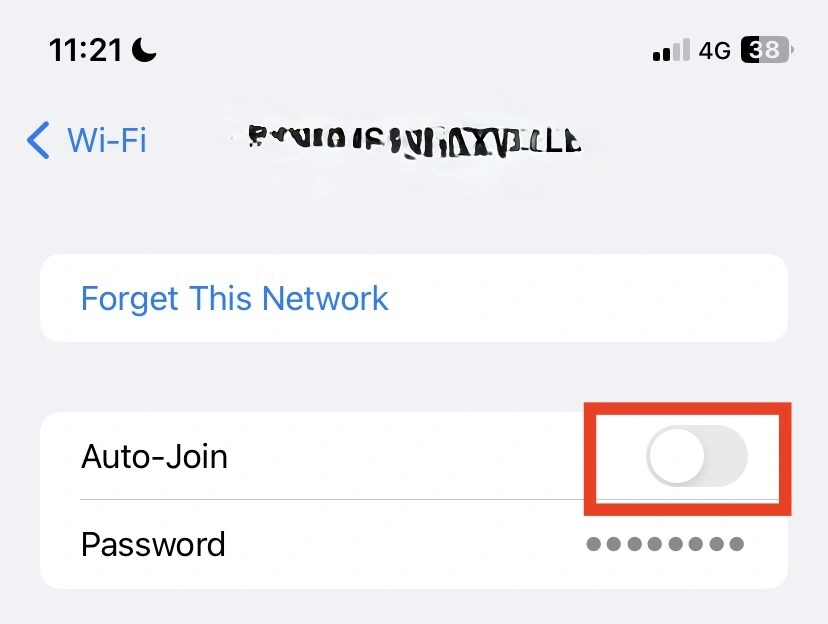
If you want to be extra safe, especially in tourist hotspots like airports or hotels, you can disable auto-connect to WiFi. This prevents your device from auto-connecting to potentially unsecured networks. Ensure that you do not ‘Auto-Join’ any public WiFi network you’re unfamiliar with, even if you’ve connected to it before. To prevent automatic connection, you can forget specific Wi-Fi networks via the following steps:
- Open Settings: Open the “Settings” app on your iPhone.
- Go to Wi-Fi Settings: Tap on “Wi-Fi”.
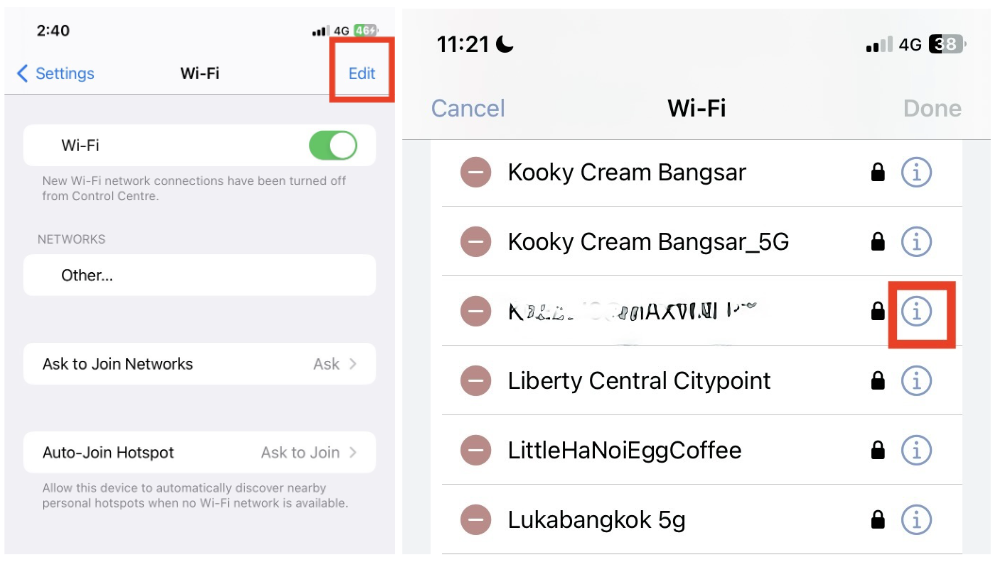
- Turn Off Auto-Join:
- Tap on “Edit” in the top right corner, and look at the section “Known Networks”.
- Tap the (i) icon next to any of these networks, and turn off Auto-Join for any network that you want to avoid auto-connecting to.
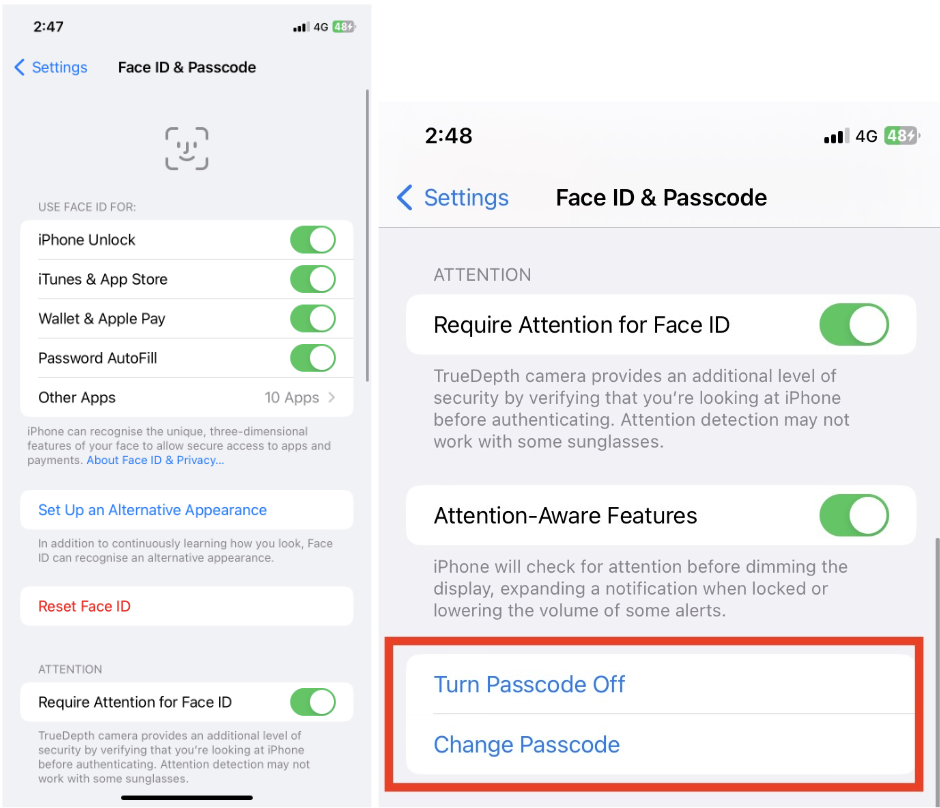
Secure your passcode: The first line of defense for your iPhone is a robust passcode. It should be obvious that you should avoid using easily guessable combinations (like birthdays or sequential numbers like “1234” or “0000”). Instead, opt for a complex passcode that includes a mix of numbers, letters, and symbols.
To set or change your passcode, navigate to Settings > Face ID & Passcode or Touch ID & Passcode.
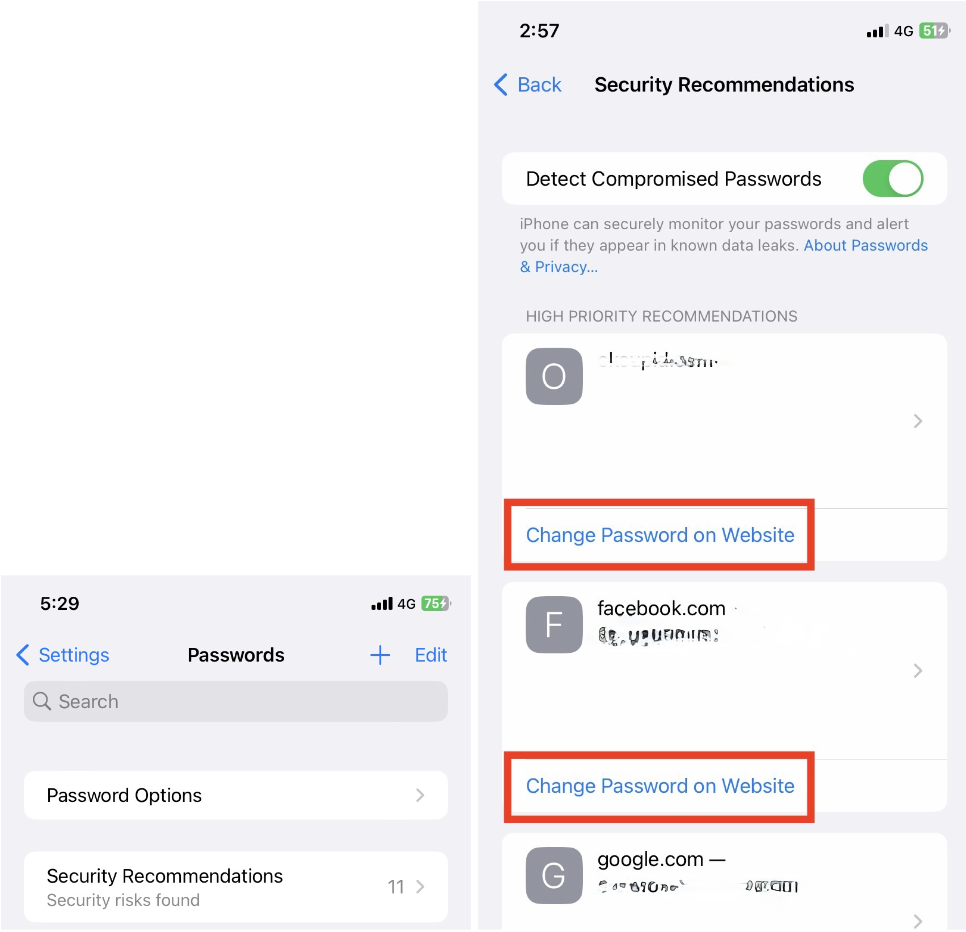
Manage your passwords: The next step is to regularly check for compromised passwords. Apple’s iCloud Keychain has a built-in feature that alerts you if a password has been compromised in a data breach. Check this information regularly in Settings > Passwords > Security Recommendations, and update compromised passwords promptly.
Regularly update iOS and Apps: Do not ignore software updates. Keep your iPhone’s operating system and apps up to date, so you can benefit from the latest security patches and bug fixes. Before you travel, do a quick check to ensure that your iPhone’s software is current, which helps protect your device from known vulnerabilities.
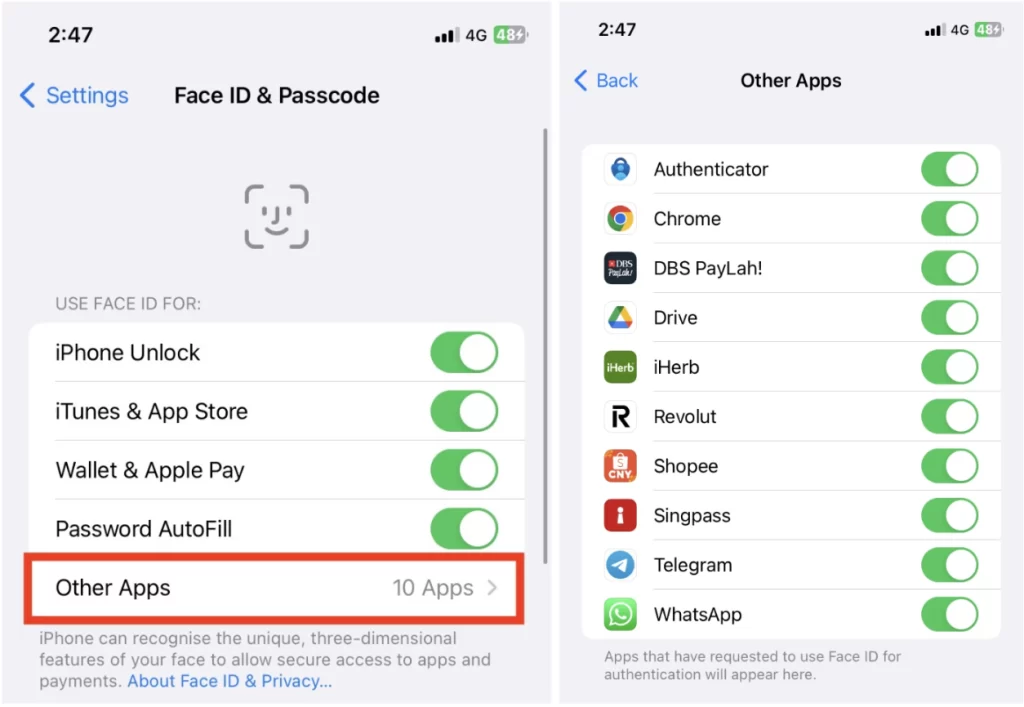
Use secure messaging apps: For your messaging and email apps, it’d be best to enable passcode or biometric authentication for added security. If you go to Settings > Face ID & Passcode > Other Apps, you’ll see all the apps that have requested to use Face ID for authentication.
Additionally, consider using end-to-end encrypted messaging apps. Apps such as iMessage, Whatsapp, and Telegram offer end-to-end encryption, which helps to protect your conversations from unauthorized access – they remain private and protected from potential eavesdroppers.